 Now it all began with a wire armature which I made from Florist's wire. I attached this to a spare 20mm plastic base I had leftover from my various Games Workshop minis. This base, like many others, was slotted, so I filled in the slot with some spare epoxy putty. speaking of which, the entire mini is made from Apoxie Sculpt, a brand of epoxy putty. Not only does it work very well, but it smells DELICIOUS. As you can see, I gave him a basic body structure and shoes on Day 1.
 Next up, Fred got hands and pants, which to me a least are both VERY important. This is where the detail started coming in. You can see the seams in his pants! That was really quite a trick to do, as it required a lot of precise exact-o knife work. I did what I could to get folds and wrinkles in there to make it look realistic. End Day 2.
 A stylish vest was next up on the list. It is complete with pockets, buttons, and a belt buckle. On this step, the buckle was by far the trickiest part. Not only is it tiny, but it's at right angles! Also, you can see that I didn't sculpt the pinstripes. Those were added later.
 Day 4 was a productive one. Fred got a tie, a head, AND his trademark lab coat. The tail of his coat I sculpted to make it seem to be blowing in the wind. That was a little on the difficult side, but not so bad. Oh, his coat also has buttons. I left a crescent for his mouth so I could add his teeth the next day.
 Next we have the most difficult part: Facial Features! Teeth, ears, nose, glasses, and eyebrows were all added. I went through one or two techniques before I figured out how to make his glasses look good. You'd be amazed at how many fiddly bits there are on a human face! There wasn't a single part of this step that WASN'T a trick to do! The ears were a real pain due to a cruel mistress called "symmetry," and the nose was just plain small! I digress...
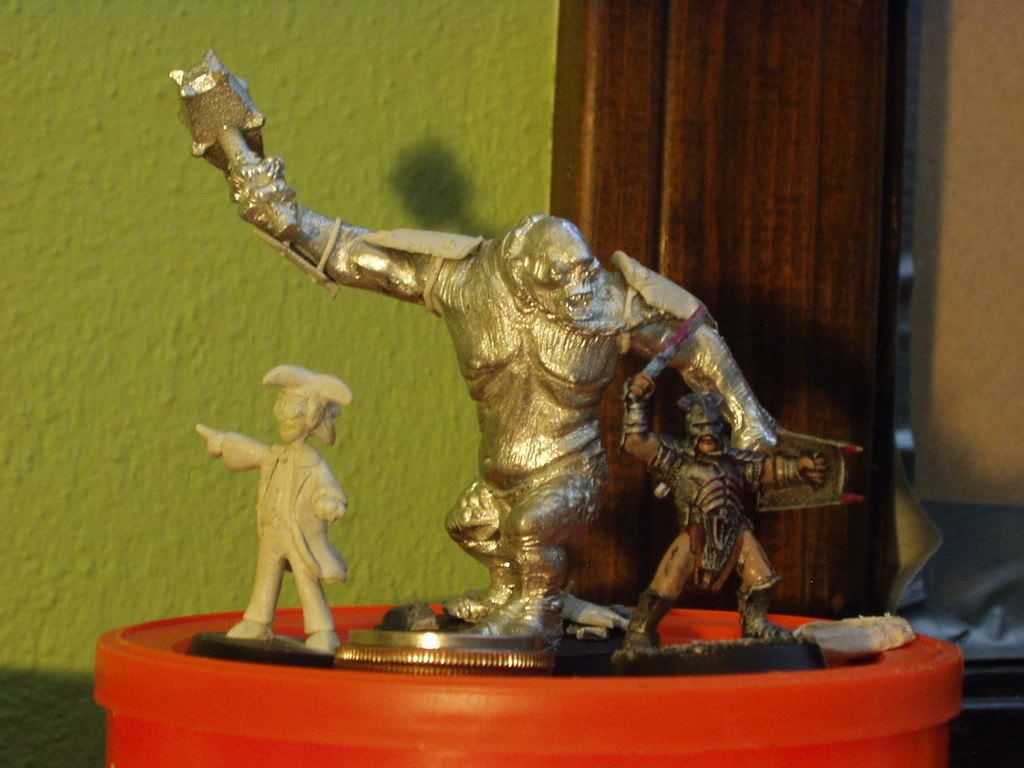
 This step was actually quite a while after the previous steps. I had sculpted Evil Fred's hair, but I didn't like the way it turned out. Months later (pictured) I fixed and finished it off. You can also see my Cave Troll before it was painted. The whitish bits are the ones I added.
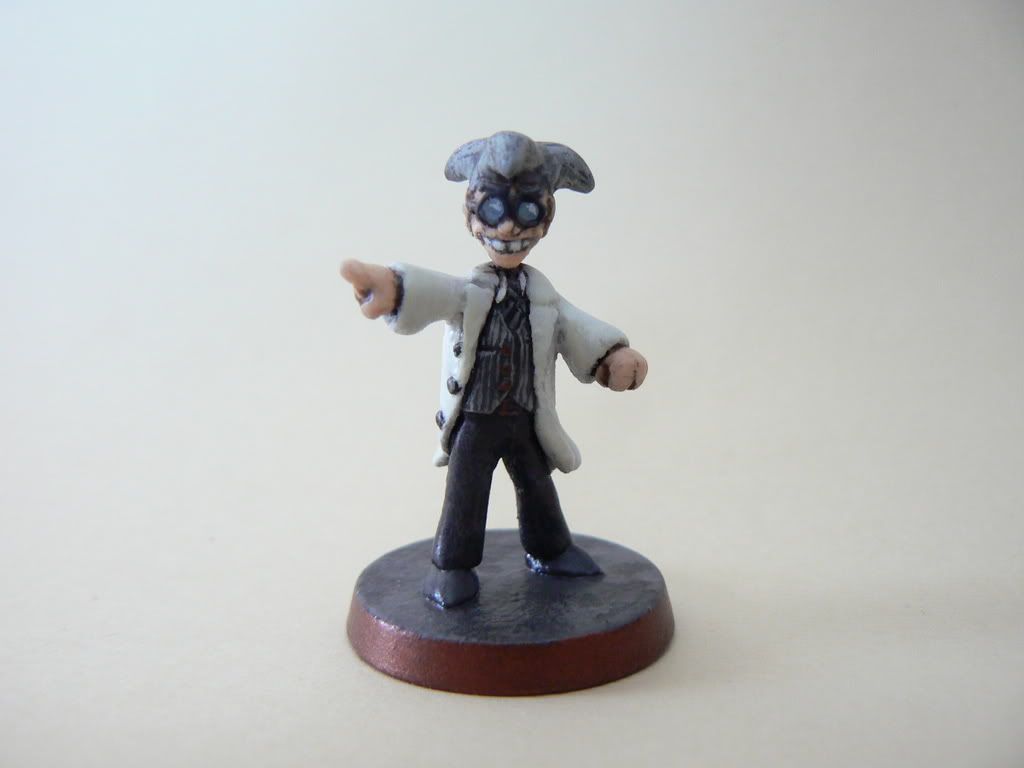
 Here is the finished product. By the by, I use Wal-Mart bought acrylic hobby paint. Many say that miniatures paints sold by Games Workshop and a few other companies are the best, but there isn't a true difference. These paints work great and they are a fraction of the cost.
I hoped you enjoyed this little guide. if you have any questions, I'll do what I can to answer!
Super cool!!
ReplyDeleteVery impressive! I find it amazing you can sculpt such tiny objects!
ReplyDelete